If you’ve recently purchased a new home, or if you simply just want to start making your home the house of your dreams, you may be feeling quite overwhelmed trying to figure out where to start.
Every single one of the rooms within your home is important, and ensuring that you are making each of them a room that makes you happy to walk into each time can do wonders for your mental health – but getting started can be a big problem.
Sometimes, breaking down things like this into easy-to-follow steps can allow you to make the design choices you need to have the home (or room) of your dreams!
Spending money on interior design can be quite a daunting task for some, especially those on low incomes.
You can make a room both look and feel great, no matter how much money you have – simply understanding the things that can help to tie a room together will allow you to work out of the budget that you have.
Don’t worry – we’ll touch on this some more, later on.
It just takes a little know-how, and some handy tips and tricks, and you’ll be designing the room of your dreams in absolutely no time.
Step One – Work Out Your Budget
The most important thing you can do to start off is set yourself a budget.
Ensuring that you understand the thresholds you have to work within might seem to constrict you at first – but this can actually be really helpful, as it will allow you to make the sacrifices that you might not have made before to ensure that you get the things you really want into your room.
Setting a budget can help with forward-planning, as well as ensuring that the design of your room is cohesive, and doesn’t include anything that doesn’t need to be there or looks out of place.
Look at the money that you have to spend, and then give yourself a figure.
It can help to make yourself a little spreadsheet, to help keep track of where you are at with your budget, what you have purchased so far, and how much you have left to both purchase and spend.
When deciding your budget, take any big purchases that you might intend to make for your room into consideration. It may be that you need just a little on top to completely bring your vision to life.
You should also consider any projects that might be made to order, for example, if you’re paying for flooring, getting a quote will help you to stay within your budget, as well as budget for additional things to go into your room.
If you do need to get a quote for something, always ask a few different companies, as different companies often charge varying amounts, and this can help you to get a feel for the average cost for that project.
The rule here is to make sure that you aren’t paying such a small amount that you won’t receive a good quality of work, but also not so much that you are blowing a hole in your budget that doesn’t need to be there.
If you aren’t hiring someone to put anything in, and you instead plan to do everything yourself, planning ahead by measuring anything that needs to be fitted and finding out how much those materials will cost is especially important.
Working out the price of something such as flooring per square foot, measuring the intended floor space, and multiplying to work out the cost is essential.
It might only cost a little per square foot, and at first, that might not seem like it needs more than a rough estimate, but that price can very quickly start to increase. It only takes your estimates to be a tiny bit out for the cost to increase exponentially.
Try to ensure that you give yourself enough money to do everything that you intend to do.
When working out the costs of specific things, it’s helpful to always round up, and add a little extra on top in order to ensure that you don’t go over budget because of unforeseen expenses.
This might be the price of something going up, or a need to substitute something else out for a slightly more expensive option.
As a rule, always include an extra 10% on top of the budget that you have figured out – 20% could be even better if you can afford it.
This means that you have money for miscalculations, updated pricing, and emergencies if something goes wrong – for example, a piece of furniture is damaged in the process.
The most essential part of coming up with a budget is that you only allow yourself to work within your budget.
The whole point of a budget is to keep your vision on track. If you decide to get something random part of the way through on impulse, you may find that it isn’t cohesive, and it also takes a massive chunk out of your budget that was previously allocated somewhere else.
Make sure that you have fully settled on your budget before you start your project.
Step Two – Creating A Mood Board
As with any project, one of the most important stages is, of course, the planning stage. The last thing you want to do is to blow your budget on items that aren’t going to work together in the space you’re working with.
When designing, the first step should be to create a mood board, so you can get all your inspiration and ideas in one place. This is going to help you see the bigger picture instead of focusing on individual items.
You may even find that your tastes are not what you thought they were.
To get this process underway and to prevent any costly mistakes, there are some things that you can consider.
The first question to ask yourself is: “what is the function or purpose of the space?”.
Is it a communal area like a kitchen that has to meet several people’s needs, or is it for a private space for yourself like a games room? If you are working on a shared space in your home, try to get your family’s input and see if they have any ideas to share.
The next thing to ask is, “what do I want the general feeling and atmosphere of the room to be?”.
Are you looking to make a luxurious bathroom to relax in, or is it going to be a man cave to chill out in after a hard day?
Once you’ve established the space it is for, the function of the space, and the feeling you want to create, it’s time to get personal and go look for what inspires you.
What types of themes, colors, and styles are you attracted to? Do you enjoy a Bohemian vibe, or are you more into your minimalism?
Even if you have a solid idea in your head, I’d encourage you to follow this step.
More often than not, you’ll find things to help build on what you already have or see potential mistakes by exploring potential design themes before you go ahead and commit to an idea.
Pinterest
When thinking about how to make a mood board, you’ll likely be able to find everything you need on Pinterest – you’re able to create a group of pins for each room, helping you to stay organized!
Download the app, make your account, search “home decor ideas” within the app and start adding pins that inspire you to a designated board.
After you have managed to accumulate a fair amount of pins, assess the board you have created as a whole.
If you seem to have any recurring themes, this is a good sign that these are the types of things that will help make you feel happy when placed within your room.
There may be a couple of things that you wouldn’t have expected to come up, and it may be that some of the things that you previously had in mind before searching have now been replaced with better ideas.
If you find that you enjoy bolder jewel tones and metallic gold and silvers, as opposed to fresh whites, this is a great place to start when it comes to working out the general aesthetic of the room.
If you find that you are drawn to a few varying themes, you can split them all into categories and compare them to see which fits your room best.
It might be that this needs to be a family decision – luckily, Pinterest has a feature that allows you to add other people to your Pinterest board, helping you to group all of your ideas together in one place.
After creating your first Pinterest board and getting a good grasp of the sorts of things you like, I would recommend that you create a secondary board, taking the ideas you have generated and researching them further.
You can look into specific things, such as lighting, couches, wallpaper choices, and rugs.
If you don’t use Pinterest, Instagram can also be an amazing source of inspiration, especially when exploring hashtags.
What Is Important To You?
Sometimes, instead of working from a theme down to the detail, it can help to start from a detail up to the theme.
For example, if you have a specific piece of artwork in mind for this room, you will be able to draw elements from this piece of artwork to help inform your decisions about the rest of the room.
What style is the artwork? Is it abstract, watercolor or photography? If it is an abstract piece of art, you might choose bolder colors to tie in, or lighter colors to help the artwork pop against the background of your room.
It could be that the artwork is mainly one color, with pops of another color—this could be something that you carry through to your main room, helping everything to stay cohesive and satisfying.
If you want to get a rug of a certain style, you will have to make sure that the other items within your room go well with the color you have selected.
Just because you like something, doesn’t automatically mean that it will work well with the other elements within the room.
In these situations, you need to decide whether to go with the thing that you like and work around that or if you need to sacrifice this specific item and move on to something more cohesive to your room design.
Trying to make the two contrasting elements gel together may be difficult, so try to choose a route to go down, instead of trying to have the best of both worlds.
Step Three – How To Make Sure Your Furniture Fits
Making sure it fits is integral to room designing—what happens if that huge rug you ordered doesn’t fit into your room?
This step is a very important one. When shopping around, you absolutely must take measurements to make sure everything is going to fit as planned—and remember to include other objects that will be going into that room as well, not just the four walls.
If you have any fireplaces, or you’re planning on having different areas within one space, it’s easy to overestimate the amount of space you actually have to work with.
Planning ahead and working out how everything will fit together is critical, specifically for this reason.
One really great idea is to make a simple drawing of a floor plan on some graph paper.
This means that you’ll have a super-accurate plan of what your room is going to look like, that you can refer back to when making any design changes.
This can also come in super handy for motivation if your project is going to take a few months to complete.
Seeing a half-finished room can be quite disheartening three months in and make it easy to give up on a project, so having little things to keep you motivated can really make a world of difference.
Using graph paper will help you to get around having to measure each thing with a ruler, you simply scale down using the squares. Make sure your plan is drawn to scale by using 1 square to be equal to one foot.
This means that everything will be spaced accurately, and can be used for reference in the future when trying to work out whether something will fit.
Alternatively, if you don’t have any graph paper to hand you’ll be able to find a free floor planner on the App Store or Google Play Store.
There are two approaches you can take when making sure things are going to fit.
You can pick the furniture you like when browsing and refer to your floor plan to see if it is going to be something you can use, or you might choose to take the measurements from your floor plan first and use that to help you find the right items.
If you have an item that you’ve already made your mind up on, like a sofa or a rug, get the exact measurements and make sure your vision is going to be realistic in the space you have to work with.
If not then work out how much space you have to use for the item and get shopping.
Step Four – How To Furnish Your Space
So, no matter what type of space you are working with, the room will have a specific function that requires a certain type of furniture. If you’re stuck on a starting point when furnishing, it’s probably best to start here.
If you’re furnishing a lounge, for example, having a couch and coffee table is often considered essential. So, depending on the space that you are working with, try to start with similar important pieces of furniture.
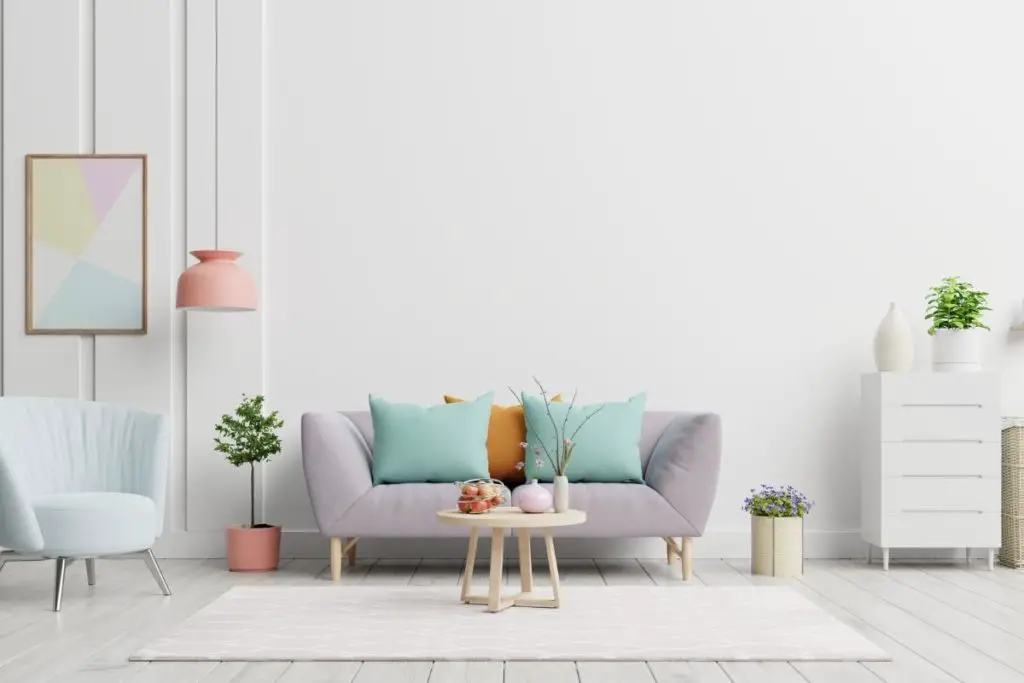
Neutrals
Start neutral, and work from there – especially with bigger pieces.
Whilst having a pop of color is great (and if bold colors are more your style, go for it!), making sure that your bigger furniture pieces are neutral will help you to make certain that the furniture in your room will work together.
These pieces might evolve to become less neutral – but to begin with, try to start with some less impactful colors.
By doing this, you avoid potentially vetoing loads of things that would have worked well in this space otherwise – for example, if you chose a bright orange couch, and found that it was hard to decide on anything else that you like in the space, you’d probably find that swapping the couch out for a more neutral color and incorporating the orange elsewhere in the room is more effective.
Of course, if you are absolutely obsessed with this orange couch and have to keep it as part of the design plan, there are ways around that – for example, using neutral colors to balance the rest of the furnishing out.
But it’s much easier a lot of the time just to start neutral, or at the very least, make sure your more prominent furniture can be incorporated into a range of theme and style choices.
This means that if you want to shake it up in a few years, you don’t have to swap out these more expensive pieces in order to change your space up, either!
When choosing furniture, remember that things will evolve. You may go through changes that require that space to become slightly different – more seating or to accommodate a pet for example.
It might even be that some furniture gets damaged over time. Try to select objects that can easily be swapped out for something similar, or for something that can completely refresh the space if necessary.
Basically – try to pick furniture that will stand the test of time, and allow you to be flexible with your interior decorating in the future.
Spending money on a piece of furniture you may not like in a year or so makes far less sense than spending money on a staple that you know will work within that specific space (or, at the very least can be utilized in another area) for years to come.
Material
Think about the material here, too. Items that will undergo a lot of use, such as couches and chairs, need to be made from a material that won’t damage or stain easily.
This means that you don’t have to worry about getting a new one at any point in the near future.
Leather works great for these types of furniture, as it can easily be wiped clean in the event of any spillages, but there are plenty of other fabrics that are resistant to staining, such as Sunbrella.
You might even decide to just purchase covers for your couch and chairs, and tablecloths for your table.
These can easily be put in the laundry and refreshed if needed—and it keeps the couch underneath clean too, so you can just pop the covers off if you have any guests!
When purchasing covers, you should make sure to measure the furniture you intend to use it on, as you don’t want to spend hours trying to make it fit your couch, just to find out you’ve ordered the wrong size!
If you’d prefer not to purchase any covers, you might want to just use a throw instead – once again, these are easy to clean, but you can add an extra splash of color to your space, whilst also placing it in the spots most likely to get dirty.
And, of course – they provide a bit of warmth and comfort when necessary, as well.
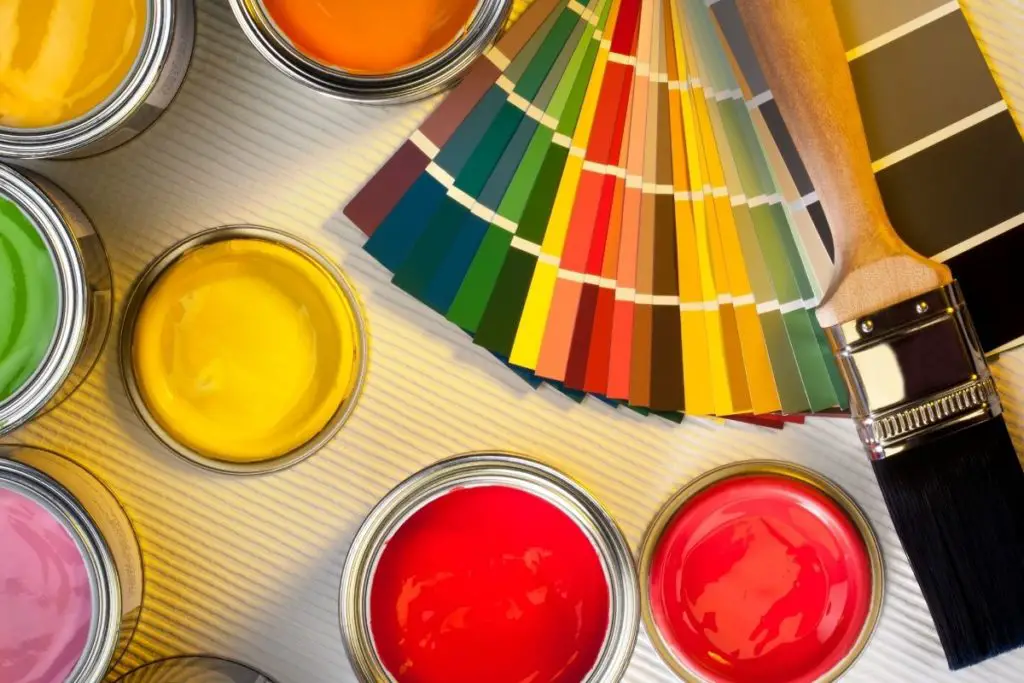
Paint
One of the most impactful aspects of a room is the wallpaper or paint color.
By simply splashing a bit of paint on your walls, you’ll see the space transform before your very eyes.
Thinking about paint and wallpaper colors is important – there are multiple ways you can go about this. Here are some things to think about:
One Color
So, the first thing to think about when painting or wallpapering your room of choice is how many colors you intend to use.
You may decide to go for a simple vibe, and just coat everything in one solid color.
This option works great, as you don’t have to worry about an extra color not incorporating itself into the room in the way you were expecting.
If you do decide to go down the one-color route, you should pay extra attention to how the color you choose affects the lighting of the room.
Selecting one dark color to coat your walls will drastically change how bright the room seems, and it will change the atmosphere of the room as a result.
The neutral rule works great here too—neutral colors are brilliant on walls, as they are easily incorporated against a whole range of themes and styles.
Making a decision when it comes to neutral colors can be difficult, even so—you can have warmer neutrals, as well as cool neutrals.
Even small details, such as whether you use a warm or cool neutral, can completely change the way that your room works together as a whole.
Make sure that the warm or cool undertones of the color you pick complement the other colors present within the space.
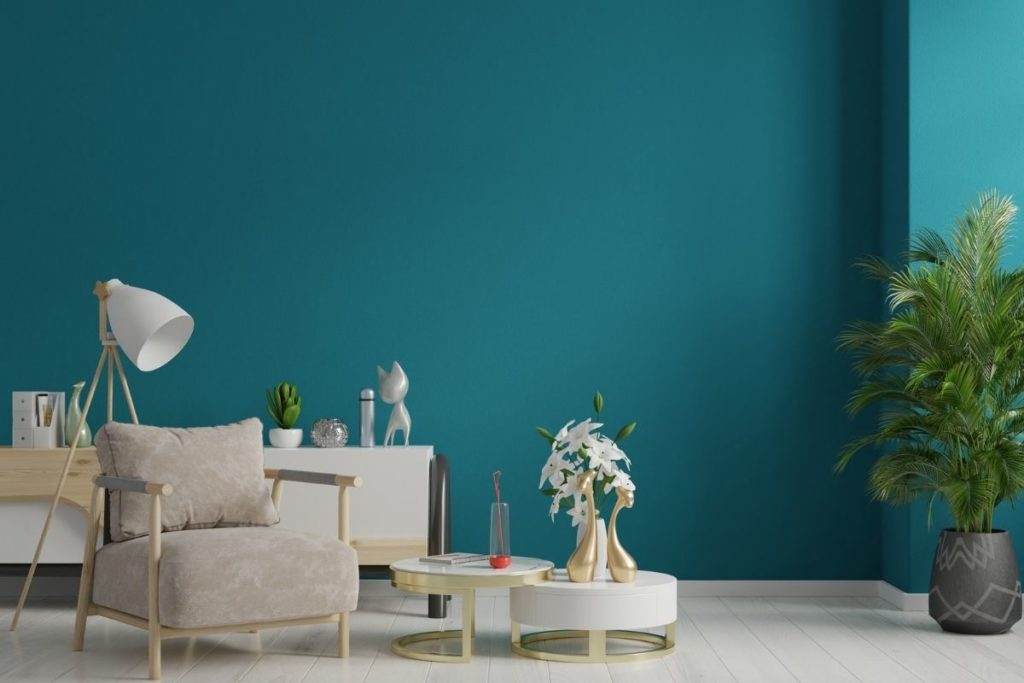
Accent Walls
So, you might decide to go with a couple of different colors instead.
In this case, think about how you plan to utilize them, first and foremost. Will you be creating an accent wall with a secondary color, or are you planning on using painter’s tape on the wall in strips to create a design with them?
In this scenario, considering the darkness of the colors you choose is important—do you want your primary color to be lighter, with a darker accent wall? Or the opposite?
Choosing either option can create a completely different room, without even changing any of the furniture.
If you plan on making a painter’s tape design, you should think about the placement of each of any dark and light colors.
This is because the color that you place before placing the tape will show up far less than the color you paint over the tape, so paying attention to this is essential.
Painters’ tape paint designs can be done very easily—all you need to do is come up with a design, paint your wall in one color, and then wait for it to dry.
After drying, place your painter’s tape on the areas that you’d like the first color to poke through from, and then paint the entire wall in your secondary color.
When you peel the painter’s tape up, your design will reveal itself.
This can be super fun, and it allows you to get really creative. If you are decorating a kid’s room, for example, it wouldn’t be hard to use the painters’ tape to create any number of cool
Make sure that the color you paste over the tape is the color you want to see the most. This will define the atmosphere of the space you are in, so you don’t want to make any impulse decisions here.
You might decide that instead of another color or painters’ tape design, you’d rather do an accent wall with wallpaper.
Wallpaper is great, as you can easily add a patterned element to your room, but it’s important to remember that it can become damaged over time, so may need to be replaced.
When it comes to wallpaper, think about the specific elements you’d like to use the wallpaper to incorporate. You can use wallpaper to do all sorts of things that would be harder to achieve using paint.
Metallic or floral elements that can be often found within wallpaper designs, for example, are harder to replicate using paint and can give your room a much more luxurious feel.
Neutrals Versus Color
Once again, you’re faced with the choice of neutrals or color. Paint doesn’t cost as much as a new piece of furniture might, so it’s okay to be a little less committed about your decision.
Once again though, really think about the effect that your paint will have on the room. If you already have loads of color, it might be best to go for more of a neutral tone to allow the color to pop.
You might also decide to do the opposite if you have no color at all, by adding color to your walls.
The most important thing to remember here though is that you can get neutral colors.
Colors such as olive green and grays with colored undertones are more neutral colors, allowing you to have the best of both worlds when it comes to your decision-making.
Step Five – How To Test Your Paint
Before deciding on any specific color on the spot (this is unlikely anyway – there are so many), make sure that you do patch tests.
Choose several places on the wall of your choice to paint a square of each color.
It can be helpful to do this numerous times in different areas, as the light will shine differently depending on where in the room you are looking, at the paint will show up differently as a result.
The great thing about the patch test is that you can conduct it over a few days.
If it’s a room that you use frequently, such as a bedroom or lounge, you will be looking at these colors and how they appear on your walls in comparison with each other all the time.
Seeing the paint patches in your space over a few days can help you to understand how you might grow to feel about each color over time, and help you to make the right decision based on how it actually looks, instead of how you might think it will look.
Step Six – Accessorize And Group
When it comes to accessories, try to choose just a few large accessories instead of lots of little ones.
Whilst it might not seem like smaller items will make much of an impact on a room, by using a lot of them, you run the risk of making the space look cluttered.
Two large ornaments evenly spaced on a shelf will look better than a lot of tiny items scattered across it.
You may think this is one way to burn a hole in your budget, but more often than not you’ll find that you’ll spend more money on numerous small items over time than investing in one or two larger items in the beginning.
For naturally smaller items, try to group them where possible. If you fell in love with a set of tiny decorative pots, try to group them no more than in threes.
Or place the pots in a nice tray, to turn multiple items into what looks like one.
Another thing you could do is choose one big thing and then a couple of smaller things, to balance them out. Arranging them in a group helps you to experiment with levels, and helps you to add a little dimension to your room.
Using decorative pots as an example: if you decided to use one large pot, you could then have a smaller one to one side in the front slightly, and then an even smaller one in the middle.
Using different sizes of the same object can help you to frame certain areas, and if you enjoy a slightly eclectic feel, this might work for you.
Grouping helps you reduce the number of things scattered around, giving the room a cleaner and more purposeful feel.
The same principle applies to wall art. If you have a few paintings or prints that you think will be perfect for you, but you don’t want to make it look cramped, group them on one wall. If it’s done right, it will be an art feature and not an eyesore.
Try to make sure that the paintings and prints work well together – you can do this by arranging them all on a flat surface, similar to how they would be arranged on your wall.
Take pictures in between ideas, so that you can compare all of your potential arrangements at the end to see which idea works best. This helps you to take a look through each of your options, whilst also avoiding any unnecessary holes in the wall that you might regret.
When hanging pictures and prints, try to use a spirit or laser level to ensure that everything is straight and not on an angle.
Simply forgetting to make sure that the artwork is straight can throw your whole room off, and make it seem like you haven’t put in as much time and hard work as you have.
Make the effort worth it – don’t take shortcuts as they can counteract all of your work, and use a spirit level.
Step Seven – Make Sure To Shop Around
Try not to make any impulsive decisions. Ensuring that everything within the space ties together is essential, and impulsive decisions don’t allow that to happen.
When you buy on impulse, you open the doors to a whole world of problems.
The first of these is the budget – impulse buys aren’t often budgeted for, and even if you do have room in your budget, there’s a chance that you wish you had spent it on something more thought out later on.
The second issue this may bring is actually to do with the space (or a lack of it) – because you have created a floor plan of how you are going to lay everything out in the room, you also need to ensure that you are keeping to that floor plan if you want everything to fit like you might have previously imagined.
Impulse buys don’t often leave enough time to fully carry out this part of the planning stage, as floor plans are often drafted and redrafted as the objects within the room are moved around.
Always wait at least a day or two before making any purchases, and always try to incorporate the prospective purchase into both your mood board and floor plan to give yourself an idea of how that item will tie into your room.
Make sure you have enough breathing room within your budget to make this purchase – what else would you have spent the money on? Is this impulsive decision going to mean that you can’t purchase something else you have planned for the room?
This is why it’s important to wait a day or so, just to be sure. If after a couple of days, the item seems like it fits into your floor plan and mood board, by all means, purchase it. But try to avoid making impulsive purchases like this throughout the whole of your project.
Whilst you might have a favorite website or catalog that’s brimming with great items, buying everything from a single source or within a single style will give your space a two-dimensional feeling.
This is your chance to go back and look at your mood board to try to find other elements to bring in.
Use color as a way to merge styles to bring out the overall feeling you set out to create, see what elements are missing or overwhelming and try to balance.
For example, if you are creating a modern, streamlined kitchen, but you found a rustic table with black cast iron legs that you would love to have, use the black to tie it in with other items in the kitchen.
Mixing styles will give the room so much more character, providing you don’t mix too many styles and remember to color match.
Speaking of black, every room needs a touch of it – at least most of the time. Don’t be afraid to look at incorporating some black accessories.
Dark tones can help ground the room whilst giving it more depth. Try deep navy, charcoal, or very dark greens if black isn’t something you want, the dark tones will complement most color schemes and give the room depth.
Step Eight – It’s Time To Get Personal
So you’ve got your color schemes and key items of furniture. Now we get to the fun part when you let your personality come through and express yourself.
Small accessories, lamps, pillows, ornaments, etc., can give you plenty of room to show some flair and truly make it into the space of your dreams.
Try to play around with different ideas and don’t be afraid to have fun with it and just see what happens. Bring in natural elements or a quirky thrift store-bought item to make the space unique to you.
This is your final opportunity to go back to the mood board and see what you could add to the mix.
You’re looking for things that not only show off an aspect of your personality, but also something you love the look of. For many people, this can be the most challenging step to the point where most will skip it.
Coffee table books, such as family photo albums or books with a sense of humor are great ways of giving your space a personal touch.
However, if you can find that perfect framed movie poster or even the yellow rotary dial phone you always wanted as a kid, the amount of satisfaction you feel placing that item within your room and making it your own will make it worth all the hard work that’s gotten you to this place.
Seeing your project come together well as a result of the planning and time you’ve put in is something to feel proud of, and personal touches like these are the perfect way to make this space feel yours.
Designing a space from the ground up can be a lot of work, but it can also be a lot of fun, and if done right will result in many years of satisfaction.
The more time you put into these projects, the more you are likely to get out of them.
Final Thoughts
Well done, you made it through to the end!
Now you know everything you need to know to design your space similar to how an interior designer would try to design it.
There are some important things to remember to ensure that you’re successful going forward:
Always make a mood board first. The mood board will give you an idea of all the different elements you are drawn to and help you to see if they can work cohesively together.
The floor plan is also extremely important. Remember, this is how you ensure that everything within your space will fit nicely together.
Thirdly, try to stick with neutrals, or at the very least keep your colors balanced. Remember that neutrals can help your pops of color to stand out and that quite often, less is more.
All of our tips are extremely helpful, but a great note to finish on is to remind you not to take shortcuts. Putting the time to plan and budget gives your project a sense of stability, and it gives you a plan to work from.
Disregarding this, in place of impulsive purchases, may result in a room that seems in-cohesive and cluttered.
Everyone can design a beautiful space, with all the personal touches necessary to make it somewhere you can relax and see as a safe place. By simply following the steps within this article, you can too!
You know yourself best, and combining that knowledge with the tips and tricks within this article is sure to result in a gorgeous, cohesive, well-flowing room that makes you happy every single time you walk through the door.
I’m Ida Oliveira, and now I want to impart my knowledge of all things interior design onto you. If you’re going through the same process of designing your house, I want to help.
So, I hope that you’ll find everything you need to know on my website. If I make the process even a little easier and more fun for you, Alexander and Pearl will have done its job.