Do you want to add brick border edging to your garden? Maybe you want to make your flower beds more of a feature with brick border edging? Or are you curious about brick border edging and want to know more? Whatever your question is that brought you here, we have the answer for you.
Figuring out how to do brick border edging can be tricky, especially if you have never done it before. You want to bring some order and style to your garden, but have no idea where to start.
So you head online for some guidance but are met with pages and pages of conflicting and contradicting information. Frustrated and disappointed, you wonder if you will ever know how to do brick border edging for your garden.
Well, no more! Today, we are here with the answers that you need. Keep reading to find out how to do brick border edging for your garden and everything you need to know about it. Get ready to become a brick-border edging expert today!
What Is Brick Border Edging?
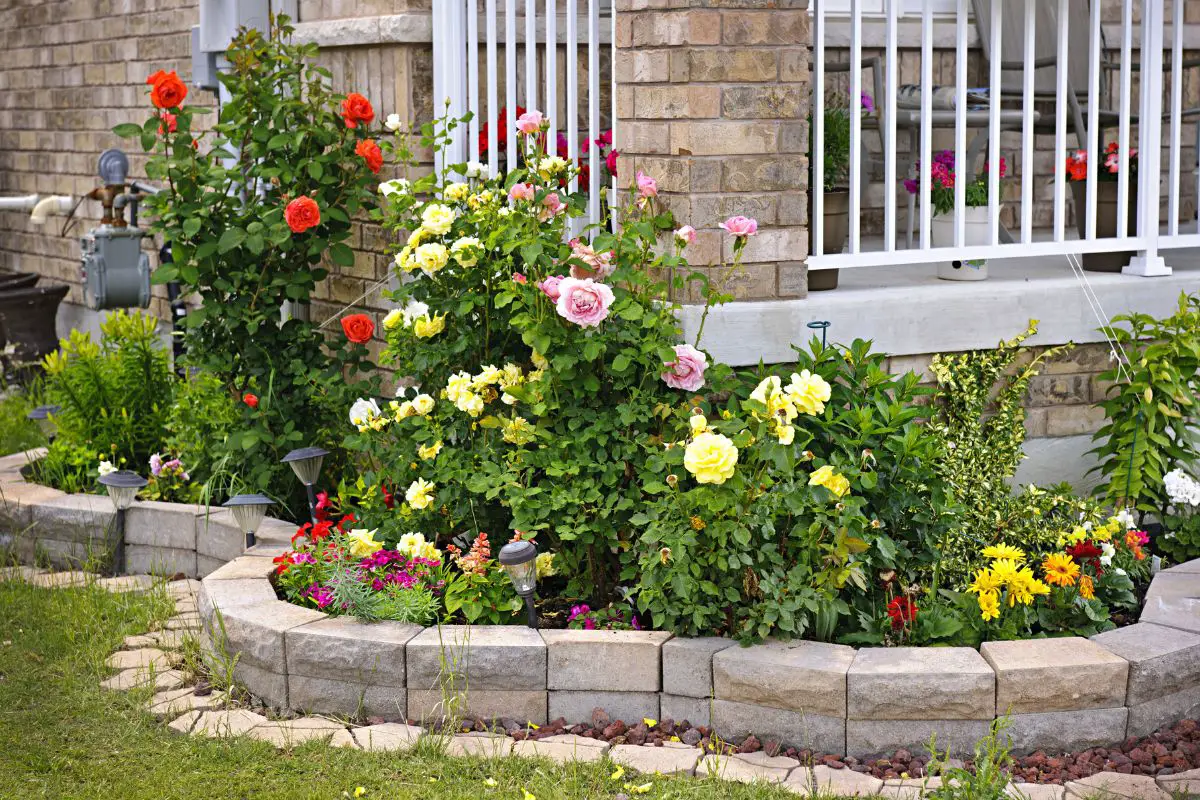
Before we dive into today’s article, let’s have a quick recap for those that need it. Brick border edging is a row of bricks, usually one brick high, that is placed in your garden.
The brick edging is often used around flower beds, although it can be placed anywhere that you want to edge in your garden.
The bricks act as a barrier, protecting your flowerbeds, and keeping their edges intact. The crisp finish you get with a brick border edging comes with minimal labour and excellent longevity! Provided you install the border correctly, you can expect it to last for years to come.
Now that we have briefly established what brick border edging is, let’s move on to see how you can install it in your garden.
How To Install Brick Border Edging In Your Garden
Let’s dive into what brought you here today! Installing a brick border edging in your garden isn’t as difficult as you might think. It takes just seven steps and is a great way to spend an afternoon.
Keep reading to check out our step-by-step guide that will walk you through the process. We have even included some handy tips that will help you make the best brick border edging in your garden.
What You Will Need
First, let’s take a look at what you need. We have compiled a list below for you to check out. These items can all be purchased at DIY, hardware stores, or online. Most of the items shouldn’t cost you too much either, allowing you to install your brick border edging on a budget.
Bricks
Flat shovel
Garden edger
Gardening gloves
Handheld shovel
Long level
Measuring tape
Paver base
Rubber mallet
Short level
String line and stakes
You can also use a scrap of wood or garden hose as your edging guide if you prefer or want to keep the costs down.
Why Use Brick For Border Edging?
There are a few reasons why we recommend using brick edging for your garden. Let’s take a look at them now.
Appearance
Brick edging comes in a range of sizes and colours. You can choose from simple bricks to elaborate designs and everything in between.
You can find bricks and create a border edging that reflects your style with ease. Plus, if you purchase the colour and style you like, then you don’t need to spend time painting or decorating them.
Durability
Brick edging will last for years! You don’t need to worry about replacing your border edging. Once it’s down, it isn’t moving! Bricks can also withstand harsh and adverse weather too, so no matter where you live, your brick border edging will stand the test of time.
Maintenance
Brick border edging requires very little maintenance. You don’t need to worry about making repairs to your border edging providing it is installed correctly. At most, you will need to weed around the edges of the bricks from time to time.
Price
Finally, the price. Bricks range in price, but you can usually find them for a reasonable price. Of course, this does depend on the bricks you are choosing. We recommend opting for a more affordable brick if your border edging is decorative.
However, if the border edging is more structural than decorative, it’s worth investing in your materials. After all, you will want to use good quality bricks that will stand the test of time.
You can reuse any bricks that you might have at home to keep the cost down, or you can head online to see if anyone is donating or selling bricks. Facebook marketplace or Craigslist are good places to find inexpensive bricks for your border edging.
Step 1 – Lay Out Your Edging
Now that you have all of your materials, it’s time to get started! You first need to lay out the design that you will follow. For a brick border edging, you can opt for a straight line or a soft s curve, the choice is yours.
To visualise your border, you will want to trace out the edging. We recommend using a hose as it offers plenty of flexibility to create the shape you want. Your bricks can be laid either vertically or horizontally.
A vertical brick border looks lovely, but you will need more bricks for this, so be sure your budget can stretch that far.
Step 2 – Create A Guide
Once you have settled on your design, it’s time to create a guide. We recommend using a string line as a guide to keeping your lines straight and your border where you want them to be.
If you don’t use a guide, you might find that your brick border edging starts to curve.
To create your guide, work out the width of your flower bed and where you want the bridge edge to end. For ours, we went with 24 inches. Next, measure 24 inches from the edging on the other side of the flower bed, or you can measure from the exterior of your house too.
Mark 24 inches with a stake in the centre and at either end of the flower bed. Take a piece of string and attach it to each of the stakes to create a guide for the edge of your brick border. This will create a straight line for you to follow when installing your brick border edging.
If you are creating a curved brick border edging or your flower bed is curved, use a hose as your guide when laying your bricks.
Step 3 – Dig A Trench
Next, it’s time to dig a trench! We used a flat spade shovel for this, but a gardener edger tool works well. This can even be a better option when you need to remove the sod.
Dig a trench where your bricks will lay around your flowerbed, you want this to be deep enough so that the top brick sits flush with the ground.
If you wanted your edging to be raised, you could dig the trench a little shallower. Follow the string line as you dig your trench to ensure that it is a straight line in the right place.
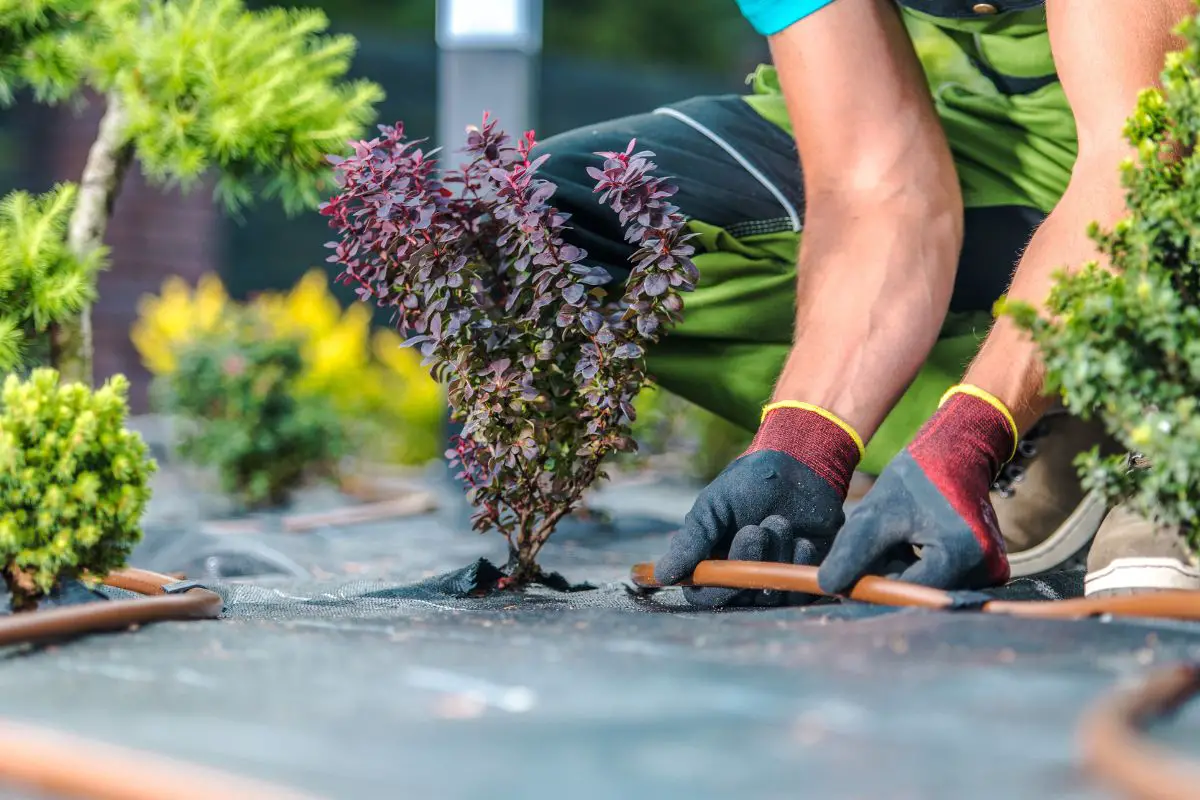
Step 4 – Add Gravel
Once the trench is dug, it’s time to add your gravel. Take a few scoops of paver base and apply it to the trench, spreading it evenly. The Paver base helps to level the bricks and provides some drainage too.
You can also add a layer of weed barrier fabric here if you wish. It can help to prevent weed growth, although it isn’t 100% necessary. Once your paving base is down, you can add your crushed gravel.
Crushed gravel acts as a barrier between the bricks and soil, preventing the erosion of the brick. It’s best to add your grave as you lay each brick rather than adding all the gravel at once. It makes the space easier to work with while you lay your bricks.
Another option is to use mortar when building your brick edging. Mortar creates a permanent structure and helps prevent weeds from growing in between the cracks.
As we are only installing a single row of bricks, we have not used mortar. Be mindful that if you are not using mortar you will need to pull a few weeds from time to time, but it shouldn’t be too many.
Step 5 – Install Your Edging
It’s time to install your bricks! There are a few things you need to consider when laying your bricks to ensure that your border is successful.
Keep The Border Level
Unless you are laying your bricks on sloping ground, you want to lay the bricks so they are level horizontally. You might need to use a longer level when you add more bricks to the border, so be sure to have one on hand. You want the bubble to be in the centre of your level at all times.
You might find that you need to dig out more dirt while doing this to lower your bricks. You can also add more paver bases to raise them up where needed. If you are working on sloped ground, your flower bed might not always be level.
Slope Each Brick
You will also want the bricks to slightly vertically slope away from the flower bed. Doing so will allow the water to drain from the flower bed easier, preventing flooding during heavy rainfall. You can use your level when sloping the bricks slightly for extra guidance if needed.
Check Your Line Is Straight
You will want to check as you lay your bricks that you are making a straight line. Follow the string line guide you have to prevent any curves in your brick border edging. You might need to move some of your bricks or restart the edging, but that’s okay! We have all been there and it can take some time to get the straight line for your border.
You can tap your bricks with your shovel to realign them too, so you often don’t need to take all the bricks out and start again.
Step 6 – Tap Each Brick
As you install each brick into your border, take a rubber mallet and gently tap it into place. If your level shows that one side of the brick is too high, you can tap it down with the mallet.
If your next brick is too low, you can add some gravel underneath. We found it better to add enough gravel so that the brick is slightly higher than the vertical row of bricks. This way, when you hit it into place with the mallet, it becomes even with the bricks you already have in place.
Step 7 – Repeat
Continue to lay your bricks using the tips we gave you earlier until your brick edge border is complete. When you get to the end, you might find that the last brick doesn’t fit the spot perfectly. When this happens, there are a few things you can do. We have included them in a list below for you to check out.
Flip a brick on its side to complete the border. You will need to dig the trench deeper here to keep the brick at the same height as the others.
Use an appropriate saw to cut the brick to size.
Fill the border with soil or gravel. This works best in an area that is covered by foliage or is inconspicuous.
Once all the bricks are laid, rake your soil to fill in any dips from the trench. Brush some sand into the cracks between the bricks to help stabilise them.
Final Thoughts
And there you have it, your complete guide on how to do brick border edging in your garden! Whether you want to add a border to your flower beds, around your decking, or anywhere else in your garden, this edging is easy to do!
In just a few hours you can have a wonderful edging that doesn’t cost a lot of money and will stand the test of time. Don’t forget to follow our step-by-step guide and use the tips we suggested for a pain-free time installing your brick border edging!
Frequently Asked Questions
Before you leave us today, be sure to check out our brief FAQ section to get the answers to your last-minute questions.
Can You Lay Bricks Directly On The Soil?
You can, but it is not something we recommend. It is best to add a base layer of gravel to prevent the bricks from eroding. Your paver base will also help with drainage and keep your bricks in place!
Do I Need Mortar For Brick Edging?
Although you can use mortar, it is not essential to use mortar on your brick border edging. If you do choose to use mortar, your border will be a lot sturdier. We recommend using mortar for brick border edges that play a structural role in your garden.
How Much Do Brick Borders Cost?
The cost of laying a brick border depends on the design and size of your border and what materials you already have to hand. To keep the cost down, we recommend asking friends or family if they have any tools that you can borrow and checking online to see if anyone is donating or selling materials for a low price.
You don’t need to spend a fortune to create a beautiful brick border!
I’m Ida Oliveira, and now I want to impart my knowledge of all things interior design onto you. If you’re going through the same process of designing your house, I want to help.
So, I hope that you’ll find everything you need to know on my website. If I make the process even a little easier and more fun for you, Alexander and Pearl will have done its job.

![ow To Design A Room Like An Interior Designer [Step By Step]](https://alexanderandpearl.co.uk/wp-content/uploads/2022/02/How-Much-Does-A-Pop-Up-Camper-Weigh-33.jpg "How To Design A Room Like An Interior Designer [Step By Step]")


")


