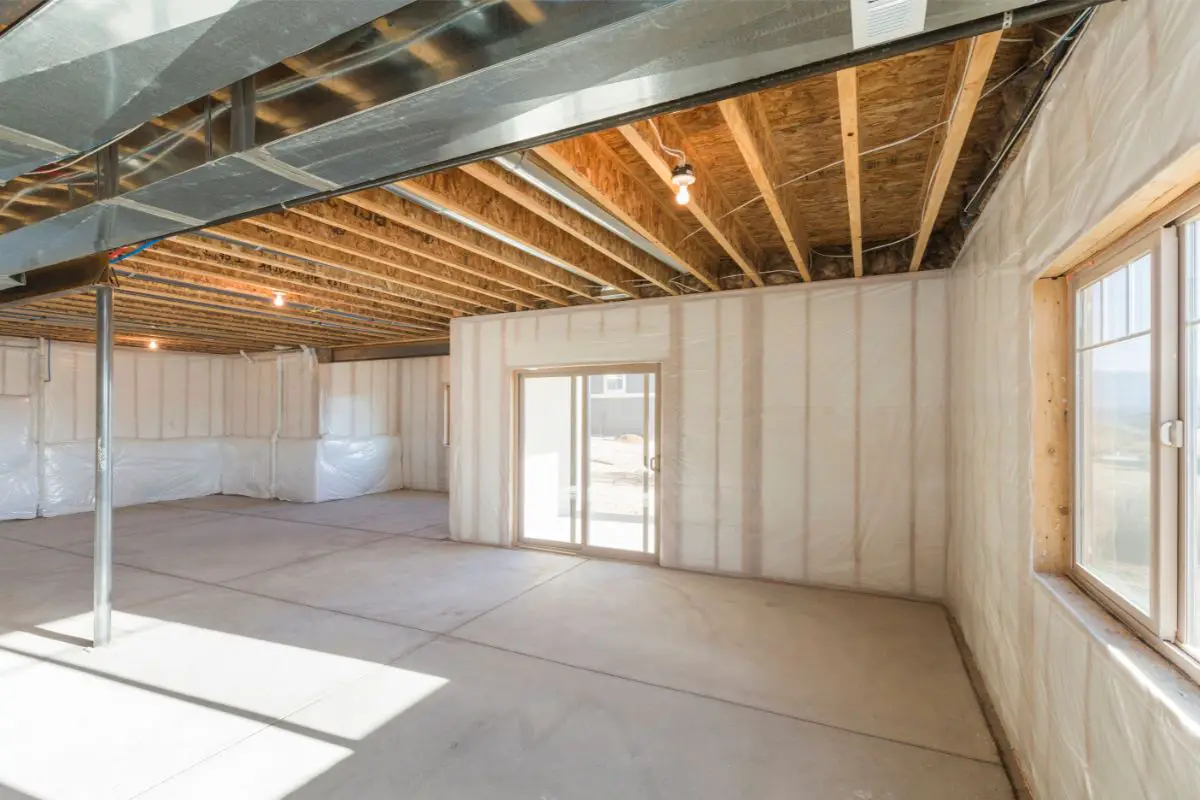
However, while a lot of people will pay attention to upgrading the look of their basement walls and floor, too many will overlook another key part: the ceiling!
The ceiling is an important part of any room, yet a lot of people will often ignore the ceiling, especially if it’s an exposed ceiling.
If you’ll excuse the pun, you could say that the ceiling “goes over their head”! With that being said, it’s an essential aspect of the room, and something that will always be in the line of vision for whoever is down there.
There are plenty of ways to spruce up your exposed basement ceiling, but one of the best and most striking ways is to paint it black. But how do you paint your exposed basement ceiling black?
We’ve got the info for you! In our incredibly useful guide below, we’ve got a detailed, thorough step by step guide to how to paint your exposed basement ceiling black.
This is a time-consuming task for sure, and pretty exhausting too, but you’ll save money on getting a professional to do it – and the room will look great!
How To Paint Your Exposed Basement Ceiling Black (Full Guide!)
Our guide below is going to give you a complete breakdown of how you can safely paint your exposed basement ceiling black, which is just about the most striking color you can give it.
The guide is divided into two different parts: preparing the ceiling and painting the ceiling.
It’s important that you follow each step in the correct order, and make sure that your exposed basement ceiling is fully prepared before you begin painting it!
Preparing Your Exposed Basement Ceiling For Painting
Since painting your basement ceiling is a delicate task, you need to make sure that the ceiling has been fully prepared beforehand for painting.
Step One: Dealing With Wires
Since the basement ceiling is exposed in this case, you’re going to need to deal with any wires that are exposed or hanging around the ceiling.
Electricity is always dangerous to interact with, so it’s important that all of your wires are neatly organized and dealt with before you begin painting the ceiling that they’re near.
If you’ve got lots of active wires hanging about there, neatly bunch them together and pin them to the ceiling joists.
You can pin them by using cord staples, stapling every couple of feet along the active wires, which will keep them out of the way.
Additionally, remove any old wiring that isn’t being used.
In all cases, make sure to be extra safe when dealing with electric wires!
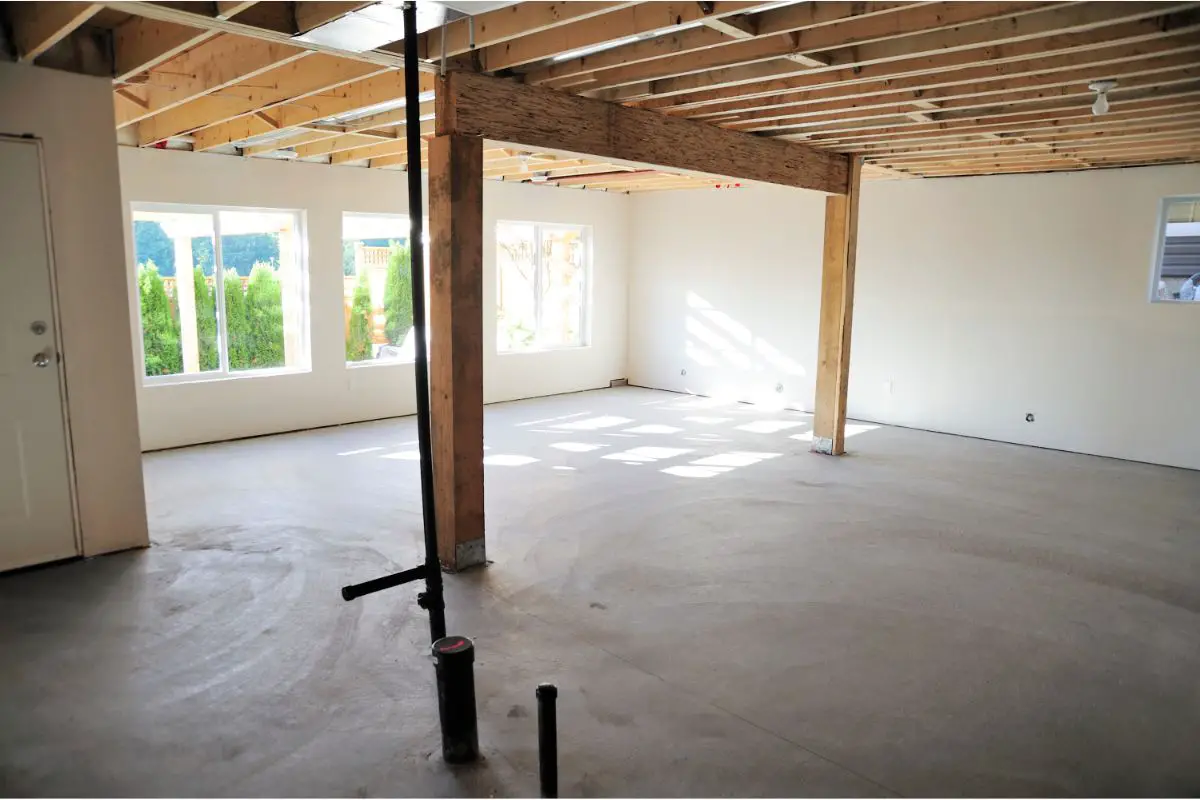
Step Two: Cleaning Your Ceiling
With the wires neatly pinned out of the way, you can start cleaning your exposed ceiling. Since it’s exposed, there’s a lot more to clean than a regular ceiling, because you’ve got all of the joists and crevices to clean around too.
There are few different ways that you can do this, thankfully! If you’ve got a leaf blower, then you can carefully use this to blow at the dirt in the ceiling.
Alternatively, a regular broom is a good tool to use, allowing you to brush at each cobweb and piece of muck.
Make sure that you clean the ceiling joists thoroughly, getting in every corner and crevice. Painting the exposed ceiling is going to be a big job, and you would hate to finish painting and find that you’ve painted over some dirt, or the paint is mixed with dust!
Step Three: Installing Any New Electricals
Finally, you might want to consider whether you’re going to be installing any new electricals and whether their wires will be running around the ceiling.
Since you’re painting the basement ceiling, you’re probably re-doing the whole basement, right? Perhaps you’re making it a basement home bar, or a den to watch movies and play games in.
As a result, you might be adding some new lighting, in which case you’ll want to hire some electricians to put in the relevant electrical wires.
Whatever they do put in, make sure that any wires that are running around the ceiling are neatly pinned away, like the pre-existing wires.
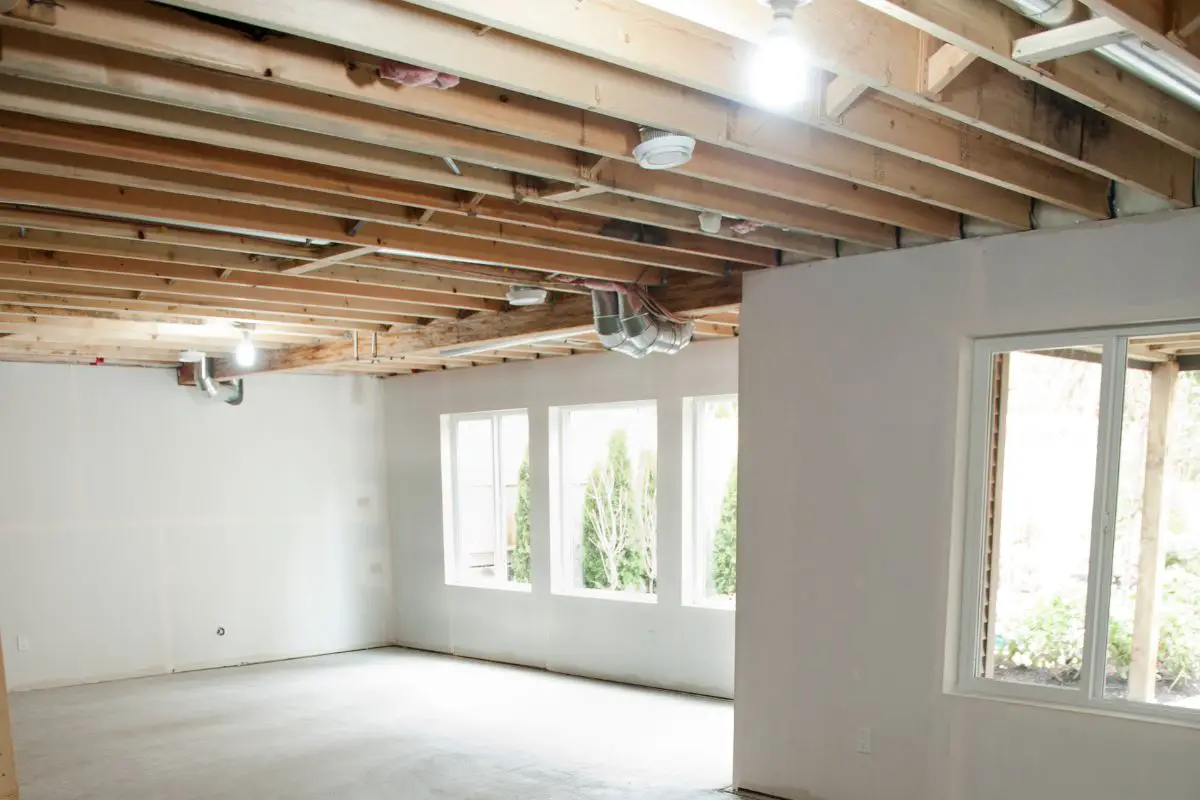
Protecting The Rest Of Your Basement
Once you’ve prepared the ceiling for its eventual painting, you’ll want to make sure that the rest of the basement is protected.
As you’ll know, painting is a pretty messy activity! Paint can get everywhere very easily, and as a result it can easily ruin things that you wanted left uncovered.
This is especially true when you’re painting a ceiling, because you’re painting something that’s above. What is gravity going to do while you’re doing that? It’s going to make bits of paint fall down from your ceiling and onto the floor, or let it run down onto the walls!
Keeping Your Basement Walls And Floor Safe
As a result, you’ll have to put in the time beforehand making sure that your basement walls and floor are kept protected.
This is especially true if you’ve already repainted your walls and floor in order to match your new color schemes! However, we recommend that you paint the ceiling before painting those other parts first anyway.
You’ve probably covered up important items before in DIY jobs, and you can use the same techniques here.
If you’ve got pieces of furniture inside the room, move them all into the center of the space (or remove them from the room completely if possible) and cover them in plastic sheeting.
Additionally, attach plastic coverings to the top-half sections of your walls too, in order to stop paint running down from your ceiling and ruining the walls.
As for the floors, you’ll want to cover them in removable plastic sheeting too.
When Not To Protect
Of course, if you’re going to be painting your basement walls and floor after you’ve done the ceiling anyway, then it can be alright to let excess ceiling paint drip onto them.
After all, you’ll be painting over those excess paint smudges anyway!
With that being said, it may be easier to simply cover everything rather than have to thoroughly paint over the marks.
Painting Your Exposed Basement Ceiling Black
Finally, with your ceiling and its wires all prepared, and the walls and floor of your basement appropriately covered up, you’re ready to get on with painting your ceiling black!
Step One: Wearing The Correct Protective Gear (Essential)
You know how you just spent time covering up your furniture, walls, and floor in order to keep them protected? Well, you kind of have to do the same for yourself!
Painting is going to be a full-on and potentially harmful experience, so you have to make sure that you’re kitted out in the correct protective gear in order to keep your health safe.
To begin with, you absolutely must wear a full body suit. These are coveralls that are going to cover your entire body, covering up your torso and legs, as well as providing a hood to cover most of your head.
Additionally, you’ll have to wear an N95 mask with a mini respirator, or a full-face respirator mask. These are essential.
Paints can contain chemical solvents that could threaten your health, exposing you to chemicals and VOCs (volatile organic compounds).
As a result, you absolutely must wear a respirator that purifies the air, making it safer for you to breathe while working.
Finally, you should wear some thick protective work gloves, in order to protect your hands, and a pair of high-quality goggles to protect your eyes.
Make sure that you get gloves that still allow you to move your hands easily, because you’ll need dexterity to do the painting.
When you’ve got the correct respirator gear, a full body suit, gloves, and goggles, you’ll be ready to paint. Do not paint without them! It’s dangerous to your health.
Step Two: Picking Your Painting Process
We’ve reached the key steps! To be honest, this is going to be the longest and most exhausting part of the process.
This is a shame, but as long as you pace yourself and make sure that you take enough breaks whenever your back is starting to hurt, it should end up okay.
But what are we going to use to paint the ceiling black?
You’ll have guessed that we’re not going to be using a paint brush and hand-brushing every inch of ceiling black, because this would take (possibly) years to finish.
No, instead we’re going to be using a paint sprayer!
Ideally, you’ve already got a paint spraying machine in your home. If not, you’ll have to go and buy one, or rent one instead.
For renters, though, you should keep in mind that this project could take 10 or so hours, depending on how large your ceiling is.
When it comes to types of paint sprayer, you’ve got your smaller sprayers that go in your hand, or you’ve got your industrial paint sprayers.
The industrial ones are likely to be attached to a wheeled device that’s connected to the paint, while the smaller sprayers will be connected to small boxes that you can more easily move around.
With that being said, the industrial paint sprayers are likely to give you a quicker painting process. However, they’re not quite as light or easy to use, and you may find it harder getting hold of one.
Step Three: Picking Your Paint
You’re free to take your pick when it comes to buying black paint for your ceiling.
Look out for a shade that you think will suit the ceiling and the rest of the room well, and make sure to buy enough to cover the entire exposed ceiling.
The bigger the ceiling, the more cans it will take. For example, a ceiling measuring 1500 square feet could take as many as 6 cans of black paint.
Step Four: Painting Your Exposed Basement Ceiling Black
With the right equipment and paint at hand, as well as the correct protective gear on your body, you’re ready to paint!
You’ll need a ladder in order to reach high enough, so carefully set out your ladder and stand on it with extreme caution. When you’re spraying narrow corners of the ceiling, you’ll probably want to be using the spray vertically.
On the other hand, when you’re spraying paint into the area between the ceiling joists, you’ll likely want to spray horizontally.
In terms of spray settings, you’ll want to keep your airpower around medium-high.
Whenever you can’t reach the next part of the ceiling, never try to stretch out from the ladder to get it, as you could fall off and damage yourself.
Instead, climb down the ladder, pick it up, and move it to a closer spot. This may be repetitive, but it’s better than hurting yourself!
Speaking of repetition, this job is going to be exhausting. Since you’re spraying a ceiling, you’re going to be holding the spray up for an awful lot of time, which will exhaust your arm.
Naturally, your back will also become exhausted and strained, as will your neck.
As a result, it’s very important that you regularly take breaks. Spray in small intervals, resting and recovering in between sessions.
Don’t overwork yourself and try to get it done quickly! This is a marathon, not a sprint. If you get to the end of the project and your back is seriously hurting, see a doctor.
Step Five: Finishing The Job
After a number of hours, ideally spread out over time, your exposed basement ceiling will eventually be done.
Or will it? See, it’s always a good idea to go back after a few days and look out for any spots of ceiling that have been missed. After all, nobody wants a patchy ceiling, as it’ll ruin the overall look of the room.
Since the job of spraying the exposed ceiling just once will have been time-consuming and exhausting, we’re not saying you have to go over and do a second coat! We’re not sure anyone has the energy for that, especially us.
Instead, you can just identify the patches of ceiling where the paint has missed them, and then go in with a paint brush or a roller to touch them up.
What Is The Benefit Of Painting Your Exposed Basement Ceiling?
There are a handful of benefits for painting your exposed basement ceiling. For one, it’s a fantastic way to liven up your basement, especially when you’re painting the ceiling back.
Just a coat of paint can instantly make the ceiling much more striking, and the use of black also helps to somewhat hide all the joists and pinned wires.
Of course, it doesn’t completely hide them, rather just “mutes” them – and this makes your basement look really cool and industrial!
Additionally, you can paint the ceiling to match a new color scheme that you’re giving the whole room overall.
On top of that, painting it yourself is going to be cheaper than hiring somebody else to do the job.
What Are The Downsides Of Painting Your Exposed Basement Ceiling?
With that being said, the major downside here is exhaustion and time. This is a big job for you to undertake by yourself, and it can hurt your back and arms if you paint for too long in each session.
Frequently Asked Questions
What Lights Go With Black Exposed Basement Ceiling?
Lighting is going to be an important part of the DIY process when you’re livening up your exposed basement ceiling with a fresh coat of black paint.
After all, you want to make sure that you’re using lights that complement the sleek black look that the ceiling now has.
For example, if you had a lampshade hanging from the ceiling before, that style might not be the best fit for the new look of the ceiling. What is?
Well, we would recommend using can lights, which are recessed lights that typically go into the hollow openings of a ceiling.
You’ll find that these lights are much slicker for the sleek black ceiling than, for example, regular lights that just hang down from your ceiling. Can lighting blends in more!
What Color Walls Should Go With A Black Basement Ceiling?
Some people will say that it’s better to paint your exposed basement ceiling a bright color, to lighten up the place. We think black is more striking, but you have to then use your walls and floor to balance it out!
It’s best to paint the basement walls and floor white or bright colors in order to off-set the black of the ceiling. If you paint them a similarly dark color, it’ll swamp the basement in darkness.
Final Thoughts
Painting your exposed basement ceiling black can make it really striking and cool. Use our guide to learn how to safely paint it yourself!
I’m Ida Oliveira, and now I want to impart my knowledge of all things interior design onto you. If you’re going through the same process of designing your house, I want to help.
So, I hope that you’ll find everything you need to know on my website. If I make the process even a little easier and more fun for you, Alexander and Pearl will have done its job.

![ow To Design A Room Like An Interior Designer [Step By Step]](https://alexanderandpearl.co.uk/wp-content/uploads/2022/02/How-Much-Does-A-Pop-Up-Camper-Weigh-33.jpg "How To Design A Room Like An Interior Designer [Step By Step]")


")

